For a good FF&E designer, he / she needs to master how to make the perfect mood board.
But what should he / she do to make the perfect mood board?
Next, share some methods and ideas about this!
But what should he / she do to make the perfect mood board?
Next, share some methods and ideas about this!
1.Moodboards On White Foam Boards
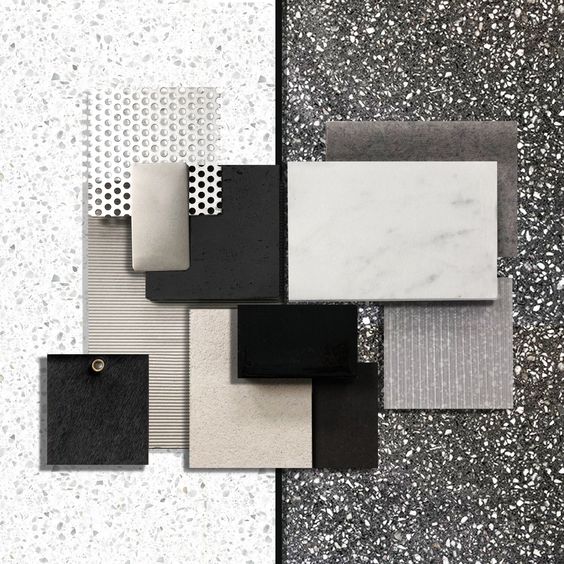
It is a classic interior design technique. A lot of fun, but time-consuming. It will also eat up a lot of space in your studio if you are not sending them out to your client since their sizes are usually A2. Here you will use soft and hard finishes, as well as furniture or mood images. It is all about sizing and positioning with this practice. You need to find the perfect balance to stay within the frame and to make something three dimensional, but not too high. It means these creations need to fit either in a portfolio bag or somewhere in your studio.
As a beginner, I have made the mistake of making them proper but too high. The examples I am showing here are not mine because I am not allowed to show them. However, these images will explain this style perfectly.

|
|
2.Moodboards Presented In Boxes
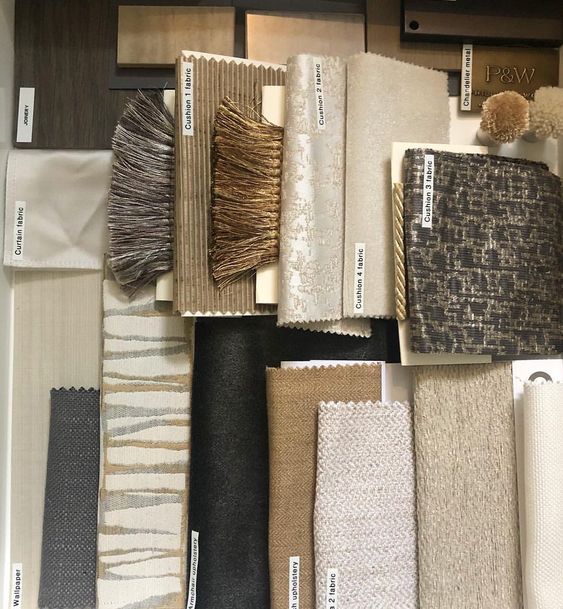
Another common way of presenting your ideas in interior design. This version is more accessible if you pitch in-person to your client because it is more packed up, but easy to separate and re-work if needed. All you need to do here is to tastefully present the finishes you wish to use in the space. If you want to learn more about how to select timber, marble, or fabrics to fit your client’s needs, sign up to my mailing list to be the first one informed about my How to make a mood board course!
Another common way of presenting your ideas in interior design. This version is more accessible if you pitch in-person to your client because it is more packed up, but easy to separate and re-work if needed. All you need to do here is to tastefully present the finishes you wish to use in the space. If you want to learn more about how to select timber, marble, or fabrics to fit your client’s needs, sign up to my mailing list to be the first one informed about my How to make a mood board course!
|
|
3.Virtual Boards
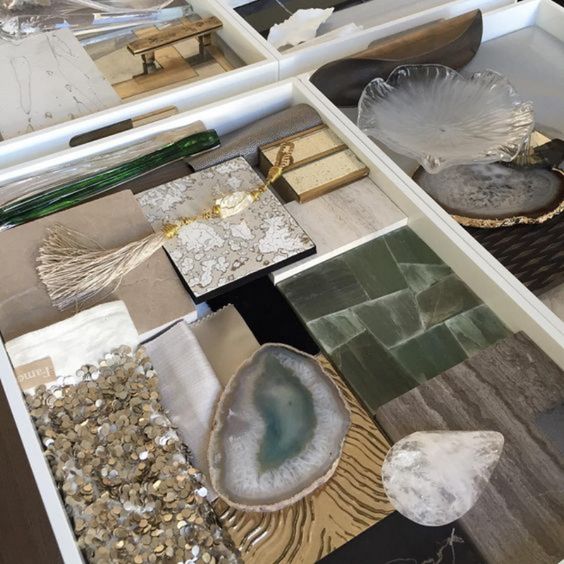
This is becoming a common practice among US designers and is probably my favourite way. One of the best parts in creating something new is where you hold the fabrics, marbles, wall coverings in your hands and place them together. However, some of you are still in school or just starting, which means you may not have a library to use for your selections. That is when you need to get creative and use your knowledge of designers and Pinterest. Please be aware of using Pinterest with moderation.
Also, I have updated my Pinterest to suit professional needs more, which is good news! Please don’t hesitate to check me out and maybe follow my profile, if you like it! I have made two boards especially for this session, which shows different ideas. I choose to represent the home of a Parisian woman and a New Yorker. The Parisian is chic, laid-back, and playful with asymmetrical wood floors and curvy stones. The colours are soft and a bit muted, so it engages with the look and feel of the city. The New Yorker, on the other hand, is loud and eclectic, because she is vibrating with the city. I used bold colours and vintage or vintage-looking furniture. I also chose to be direct and put an image of these cities behind. It is not common practice, but I felt it gave more character to these boards.

|

|